FPGA Development with wujian100 SoC - Part Four: Hello World
Print Hello World with wujian100 SoC.
FPGA Development with wujian100 SoC
Part Four: Hello World
Author: 加一(Jiayi)
Something to say
Recently I participate a contest named Integrate Circuit Innovation Contest which requires me to use WJ100 developed by Ali Inc. team t-head and a FPGA develop board with Xlinx XC7A200TR3B Core. It’s not my first time to cope with FPGA but still, I find it difficult to interpret Verilog Code and make the FPGA works. Luckily, with the help of WJ100 Sdk and CDK(C-sky Develop Kit) which developed by Ali Inc. we could jump the Verilog and long waiting synthesizing part directly to use the pre-setted circuit and easy writing C to develop.
About WJ100
T-Head’s Wujian SoC Platform utilizes the cloud-terminal-integration design philosophy that fuses software and hardware. Full stack integration of chips, operating systems and algorithms enables customers to develop chip products that can be mass-production.
Low power consumption: User-defined power consumption scenarios, with standby power consumption of less than 1uA, and operating power consumption of less than 100uA/MHz
According to the official sites of t-head Inc., WJ100 is a low cost and high power efficiency SoC, which barely means that it could be easily deployed on any chips and consumes lower power.
However, as I talked before, it is a open source project and as I believed, the real function of this SoC is to simplify the use of FPGA and to offer the developer a brand new way to develop: integrate Soc and FPGA to deal with some projects which require both power efficiency and fast steady frequency.
- related websites t-head
How to use WJ100 SoC
This tutorial is for those who utilize vivado to generate bitstream file and CDK to develop your own projects with Windows.
-
For Part 1 Bitsream Generation please refer to Part_1_Bitstream_Generation.
-
For Part 2 CDK Toolkit and wujian100 SDK please refer to Part_2_CDK_Toolkit&Wujian100_SDK.
-
For Part 3 Start a New Project on CDK please refer to Part_3_Start_a_New_Project_on_CDK
-
For Part 4 Hello World please refer to Part4_Hello_World
-
For Part 5 GPIO please refer to Part5_GPIO
-
For Part 6 UART please refer to Part6_UART
-
For Part 7 TIMER please refer to Part7_TIMER
-
For Part 8 Interrupt please refer to Part8_VIC
Part 4 Hello World
After all that sruggles before, now we could finally write our programs by using CDK which is relatively simple if you have some background knowledge about working on Microprocessor, say STM32, Arduino or so. Let us strat with s simple Hello World project.
1 Open project
Open the cdk project we just built in Part 3. And open main.c Under folder main.
2 Main function
Since it is an exclusively simple file, I would skip to expain what’s what. However, you may have some probelm why printf function could make an output and where does this string goes to.
/******************************************************************************
* @file     main.c
* @brief    hello world
* @version  V1.0
* @date     31. Mar. 2020
******************************************************************************/

#include <stdio.h>

int main(void)
{
    printf("Hello World!\n --example by jiayi\n");

    return 0;
}
3 Why this simple
To reveal where printf function remaps, open board_init.c under path ./board/wujian100_open_evb as we could see below.
void board_init(void)
{
    int32_t ret = 0;
    /* init the console*/
    clock_timer_init();
    clock_timer_start();

    console_handle = csi_usart_initialize(CONSOLE_IDX, NULL);
    /* config the UART */
    ret = csi_usart_config(console_handle, 115200, USART_MODE_ASYNCHRONOUS, USART_PARITY_NONE, USART_STOP_BITS_1, USART_DATA_BITS_8);

    if (ret < 0) {
        return;
    }
}
usart is initiallized. And also, timer is initialized to make delay functionale.
4 Let us dig deeper
To dig deeper, right click variable console_handle and goto implementation. We could find this variable is defined in minilibc_port.c which gives a mapping function from usart to fputc and fgetc which make it easier to programm
int fputc(int ch, FILE *stream)
{
    (void)stream;

    if (console_handle == NULL) {
        return -1;
    }

    if (ch == '\n') {
        csi_usart_putchar(console_handle, '\r');
    }

    csi_usart_putchar(console_handle, ch);

    return 0;
}

int fgetc(FILE *stream)
{
    uint8_t ch;
    (void)stream;

    if (console_handle == NULL) {
        return -1;
    }

    csi_usart_getchar(console_handle, &ch);

    return ch;
}
5 How to run this project
- Open CDK project as direction above and make sure to open
serial panelto receive message.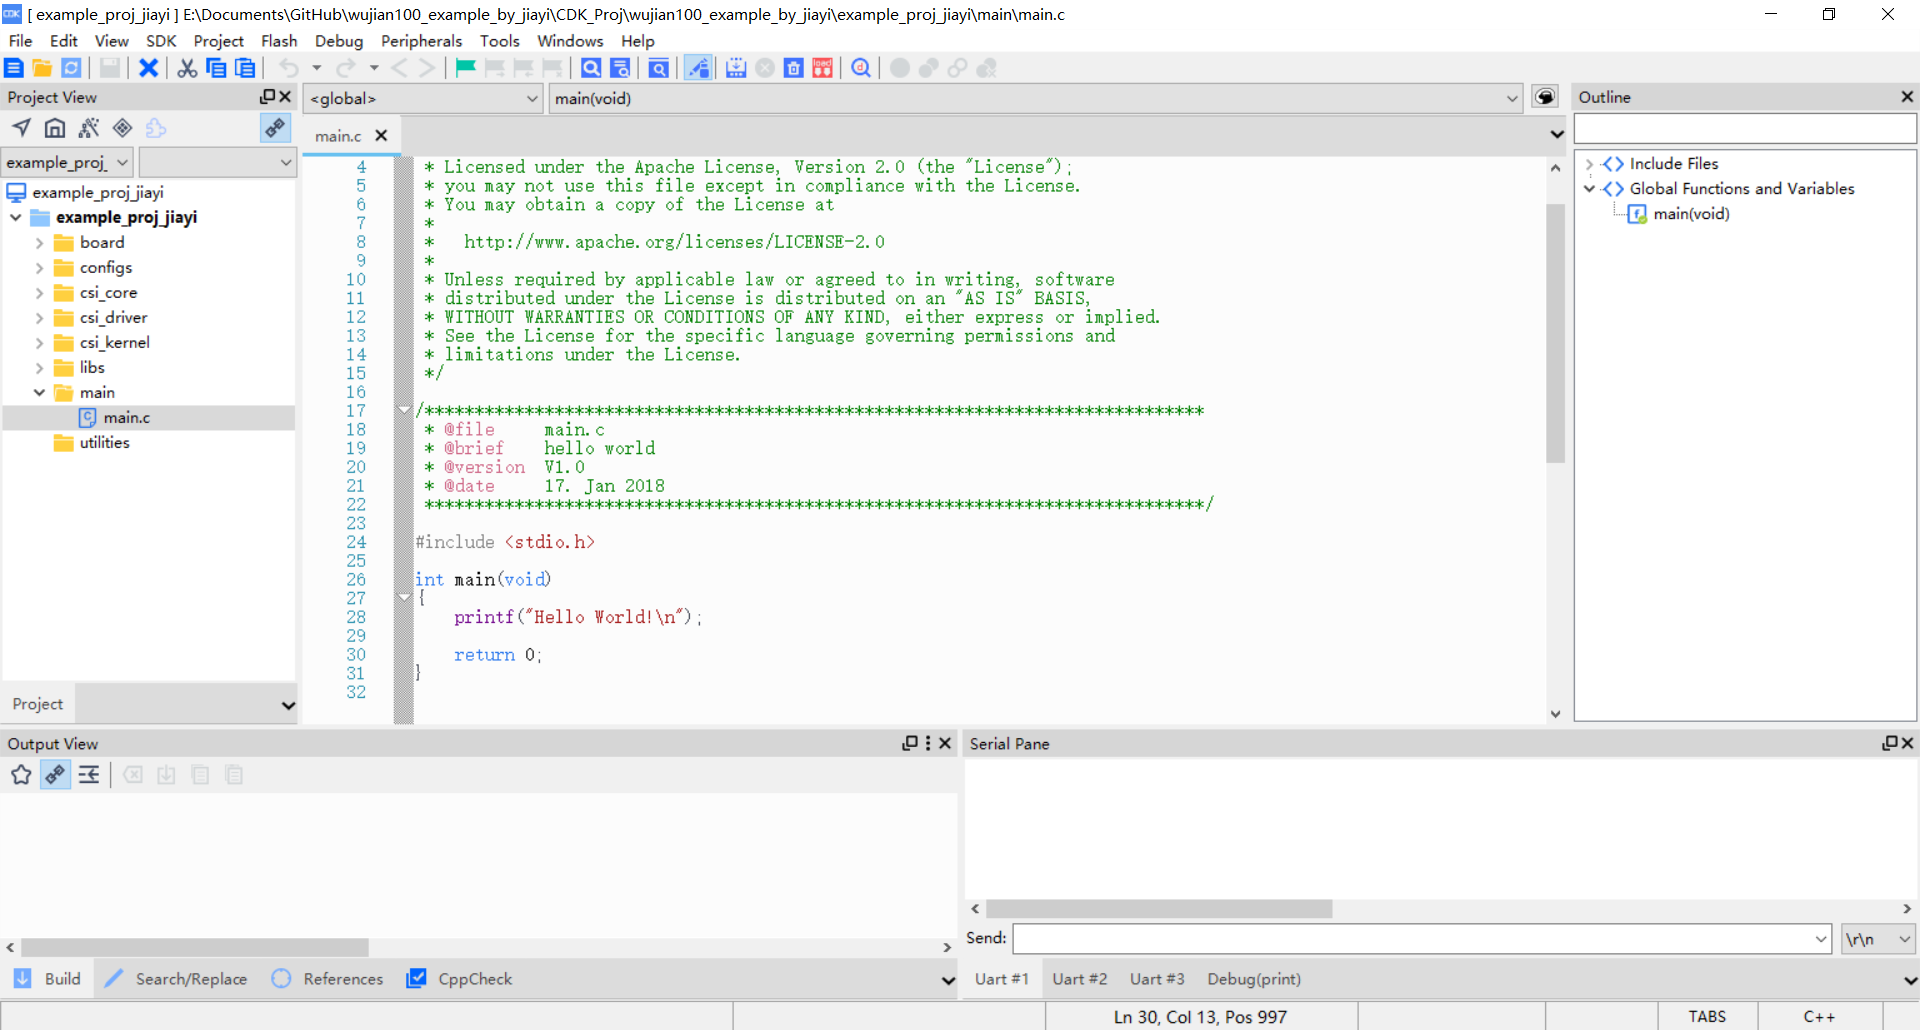
- Right click on serial panel and choose
settings.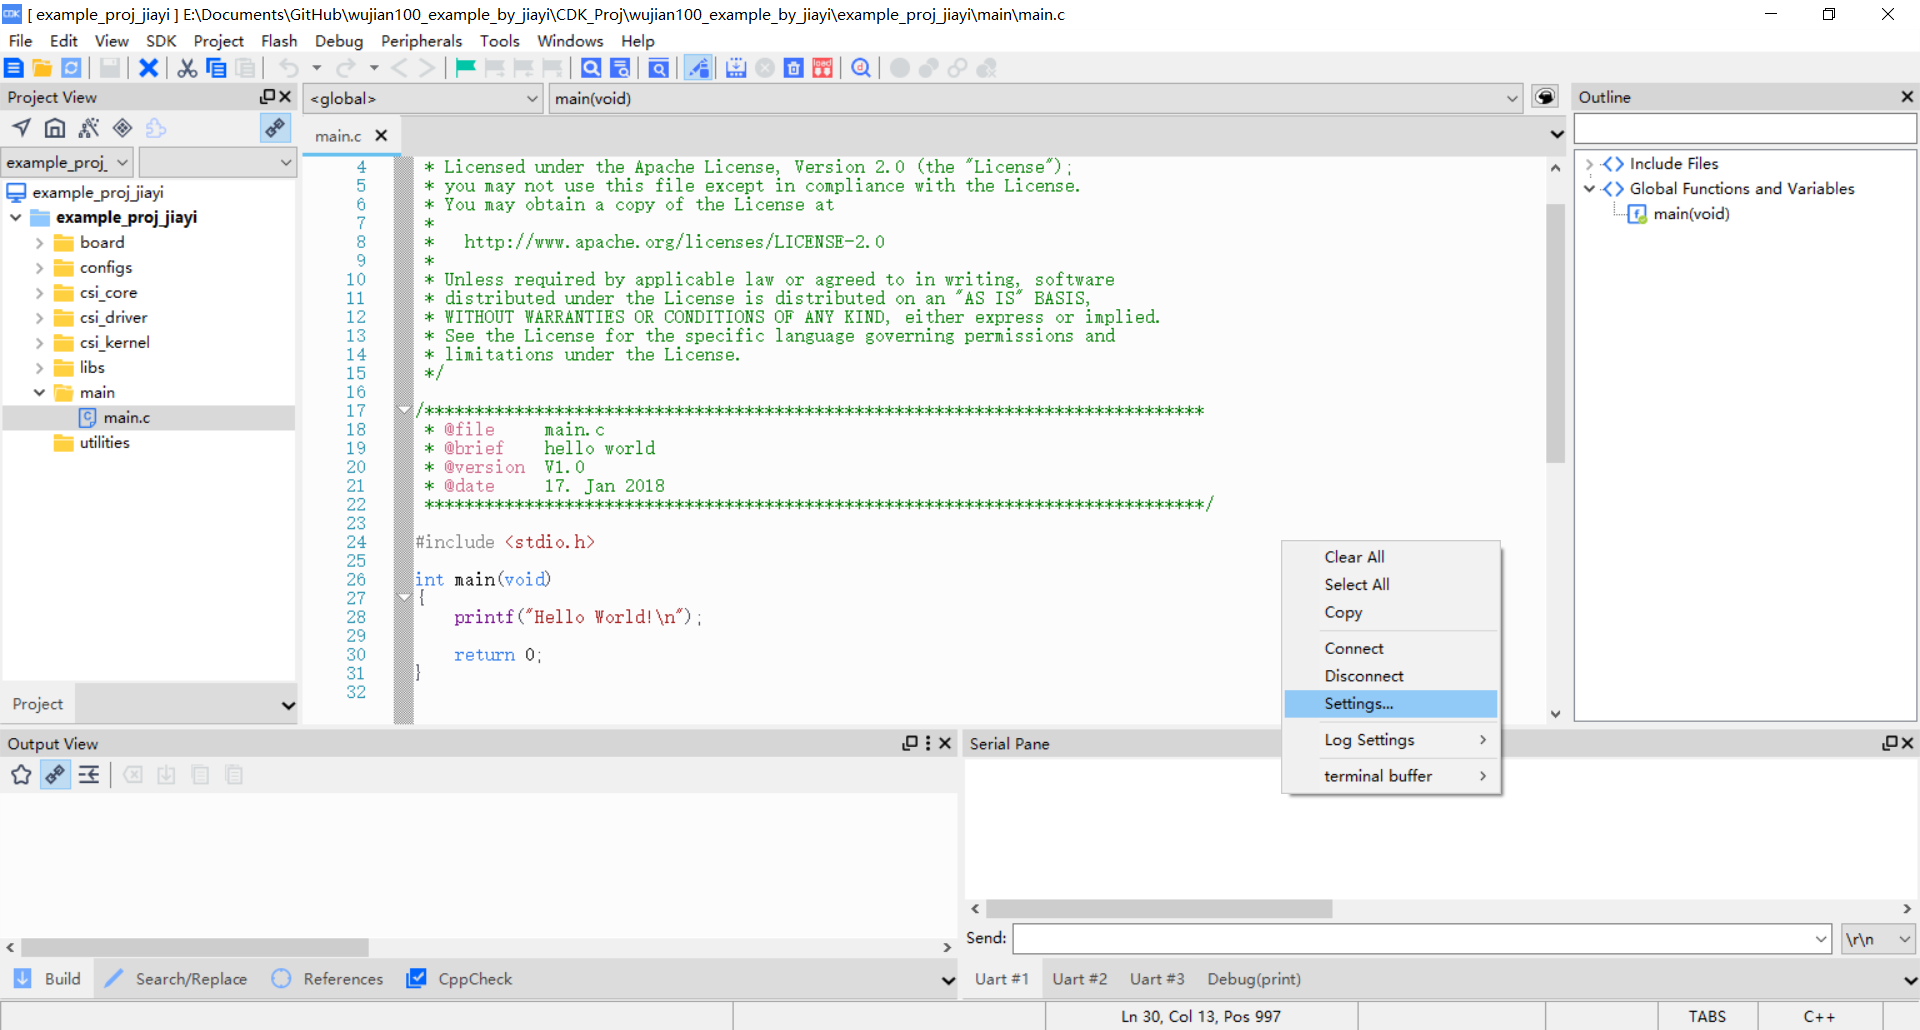
-
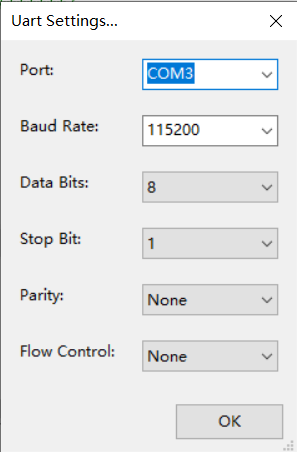
Since the UART has been configured as in the functions demonstrated in
3which isBaud rate: 115200 //Baud rate with 115200 Mode: USART_MODE_ASYNCHRONOUS //mode asychronous Parity: USART_PARITY_NONE //not using parity flag Stop bits: USART_STOP_BITS_1 //1 stop bits Data bits: USART_DATA_BITS_8 //8 data bitsHence we must configure the serial panel with same configuration. And do not forget to check which com port your device uses, or you could test one by one.
-
Click
okand you should have successfully finished your serial configuration. And your serial panel should be like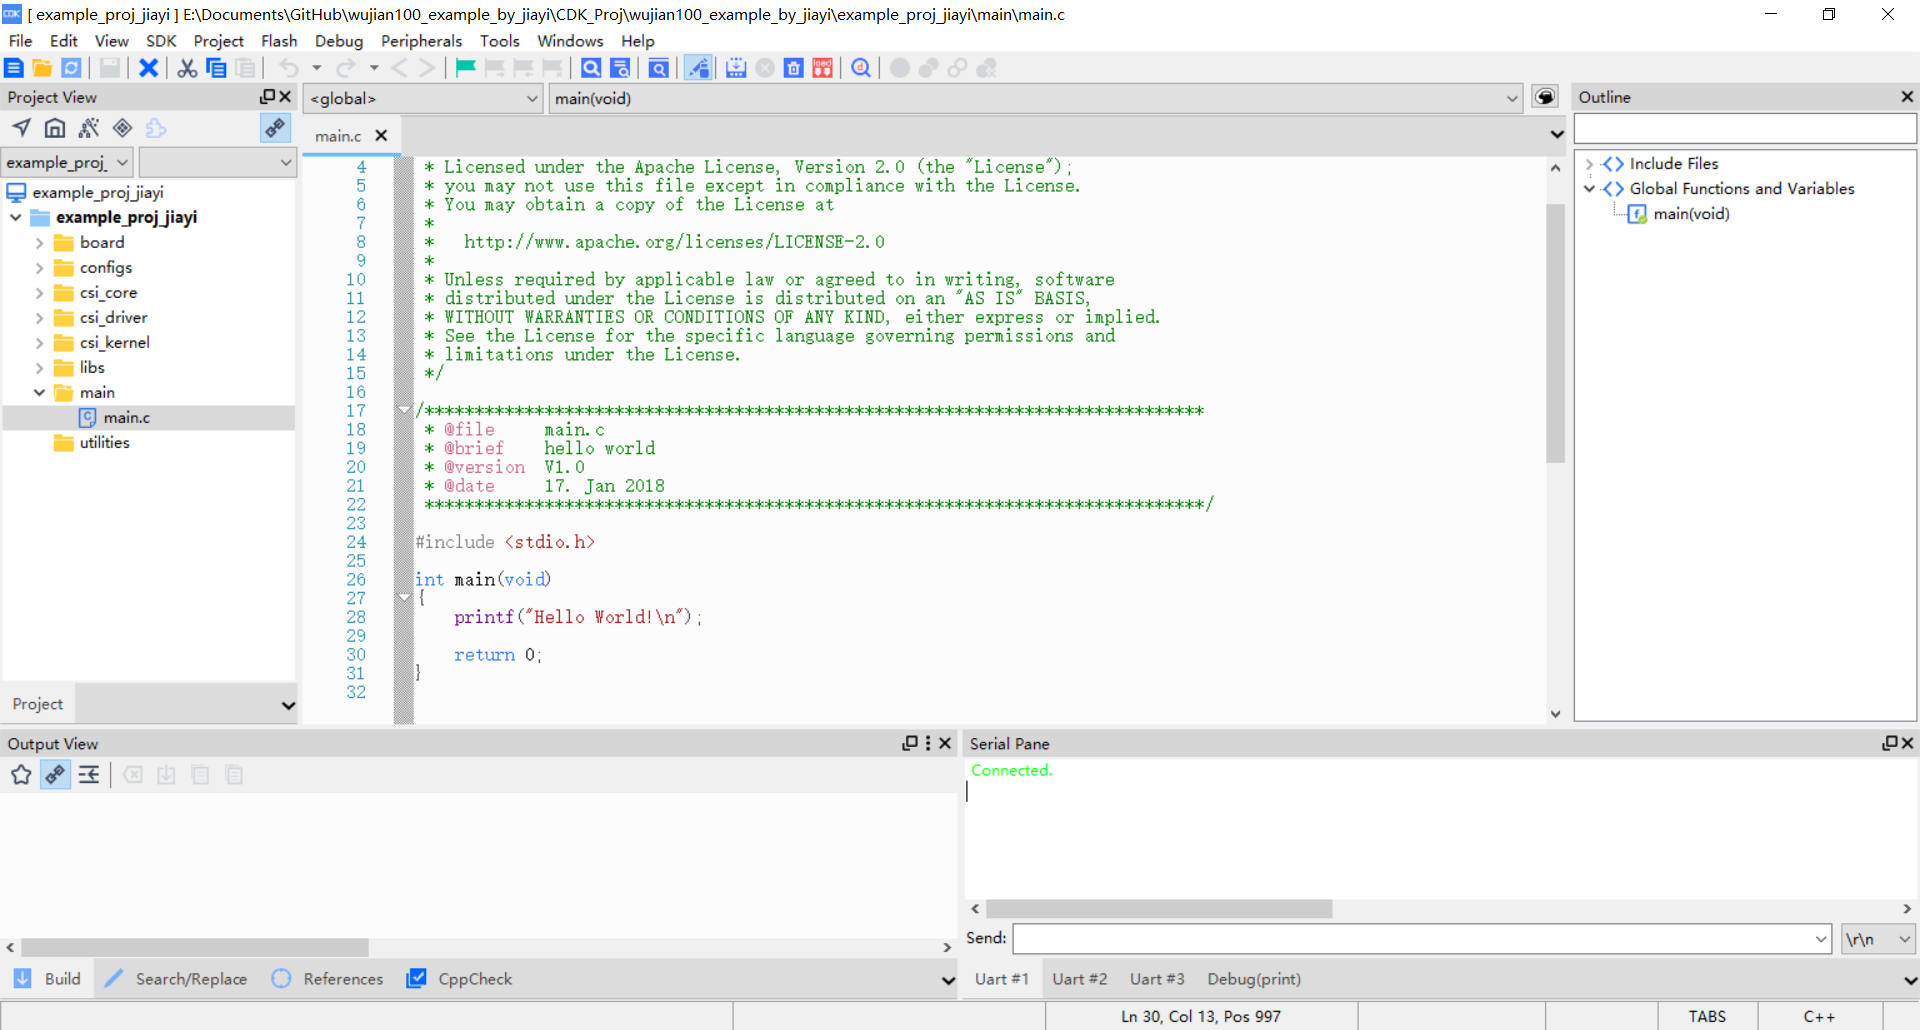
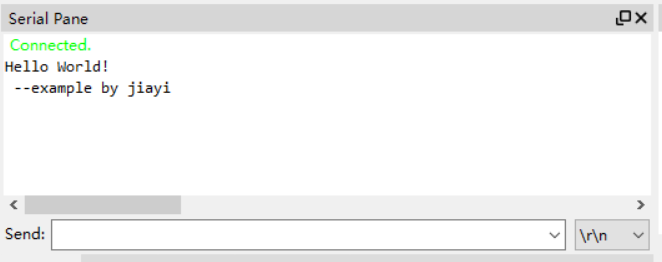
- Run the project with the debugger and start debug. And as you could see below, success!
___________________________________________________________________
This article might be updated in the future, please refer to the original site: https://shieldjy.github.io/post/FPGA-Development-with-WJ100-SoC-P4.html , to avoid misleading by false or out-dated information, and to have a better reading experience.
If you would like to follow my latest blog, please click RSS Subscribe。
___________________________________________________________________

It is widely welcomed to copy and redistribute the material in any medium or format as well as remix, transform, and build upon the material, but make sure you have referred Jiayi (And include the url: https://shieldjy.github.io ).
However, You may not use the material for commercial purposes. If you remix, transform, or build upon the material, you must distribute your contributions under the same license as the original.
If there is any problem, please contact me for further information. (lijiayi19971127@hotmail.com)